"The Lost Spirits of Polynesia"
Background.
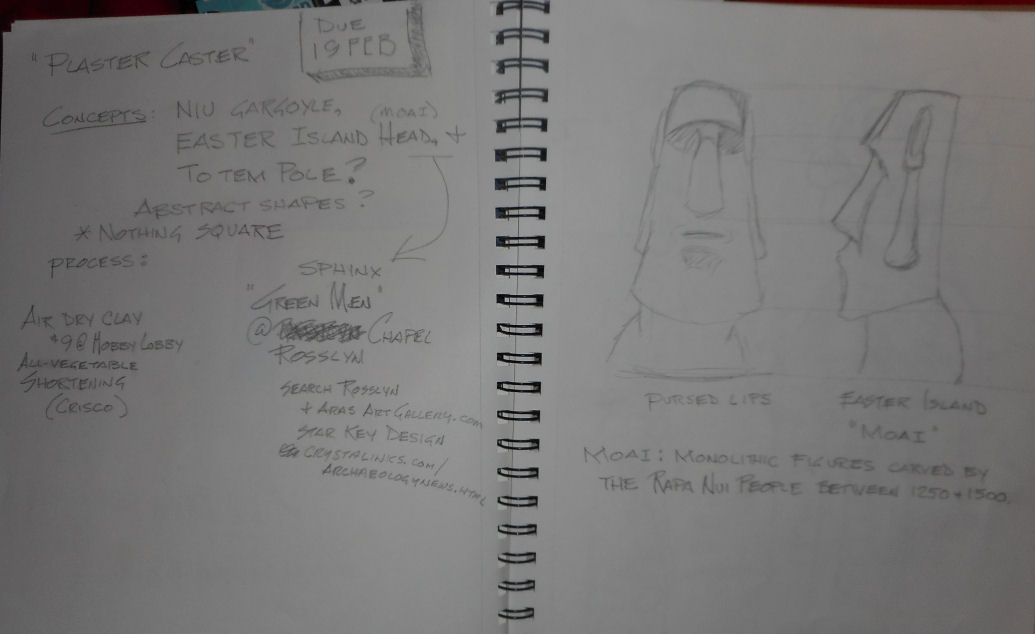
Moai are the minimalist-style head statues most famously created by the Rapa Nui people on Easter Island between 1250 & 1500 AD. Many other moai (lower case 'm') are found throughout Polynesia along with totem-esque poles called tikis. The Rapa Nui didn't create tikis. If they did, they were lost to history as the Rapa Nui had deforested their entire island to use the trees as rollers to move the large Moai, which are the living faces of deified ancestors. Some stand as high as 33ft and weigh as much as 82 tons.
On Easter Island, most Moai are situated near a large quarry, but the rest were transported to other areas and face inland. Exactly how they were sculpted remains a mystery as very little writing remains from the Rapa Nui and has yet to be officially translated.
As there weren't any trees left, repairing dwellings became increasing difficult as did raising domestic animals for food and life in general; so the clans were forced to seek new islands to call home.
Tikis usually feature only one character, however, there have been tikis found with multiple characters much like the totem poles of the Pacific Northwest.
Process.
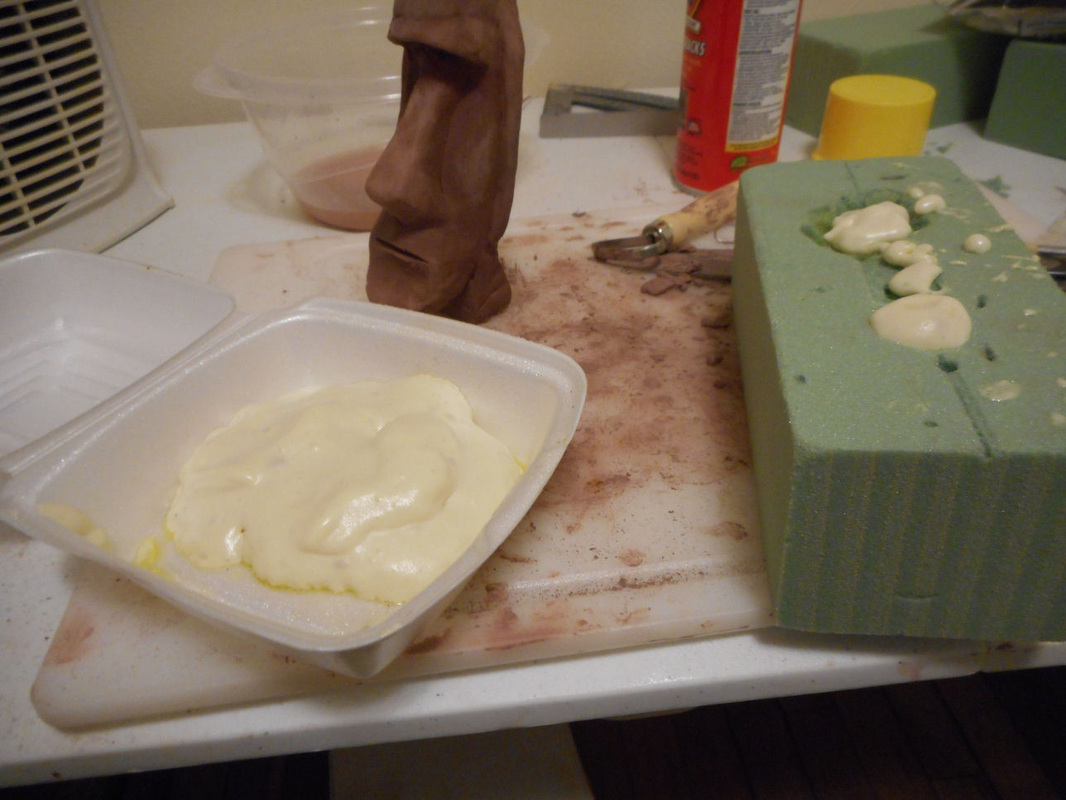
This was my first time sculpting anything since I was in kindergarten, so this project went through several generations from concept to completion. The rubric called to make three molds for plaster to show texture and must tie-in together. When we were asked to make molds to pour plaster into, I immediately thought of my grandfather. He used to create lead soldiers from his own molds when my dad was a kid. Those molds are long gone, but the idea stuck with me. While classmates were making basic molds (see the green box in pic 4), I wanted something a bit more complex. I wanted to create a 2-piece mold so that if I liked a figure, I could create more if I wanted to.
Ideas. Ideas. Ideas. I can sculpt anything I want. What shall it be. Hmmm. After a number of sketches, I decided on objects that were shrouded in mystery. That's right up my alley as I'll chase almost anything about the unknown down a rabbit hole. Stonehenge seemed too easy as did the Egyptian Pyramids. The carvings at Rosslyn Chapel were a little beyond my ability at this point, so....ah! The Moai of Easter Island, or less specifically, the moai found throughout Polynesia. A totem pole from the Pacific Northwest was still in the back of my head as well as "Olive Goyle," the often ill-fated gargoyle from Altgeld Hall here at NIU.
Beginning.
Starting with some sketches and a refresher about the Rapa Nui was first on the agenda. (Pic 1), then it was off to the hobby store to fill my little workshop with toys and supplies.
I had done quite a bit of research on youTube to learn about various molds, but none of them were specific to the way I planned to do this project.
My original plan was to create a 'positive' out of clay as a visual reference, sculpt into some foam, and pour the plaster into the foam mold. Plan B was to find soft enough foam to "push" the clay figure into. Plan C was to cover the object with sealant foam. I went with Plan D. Sculpt individual pieces out of plaster, so it was off to the hardware store for more toys.
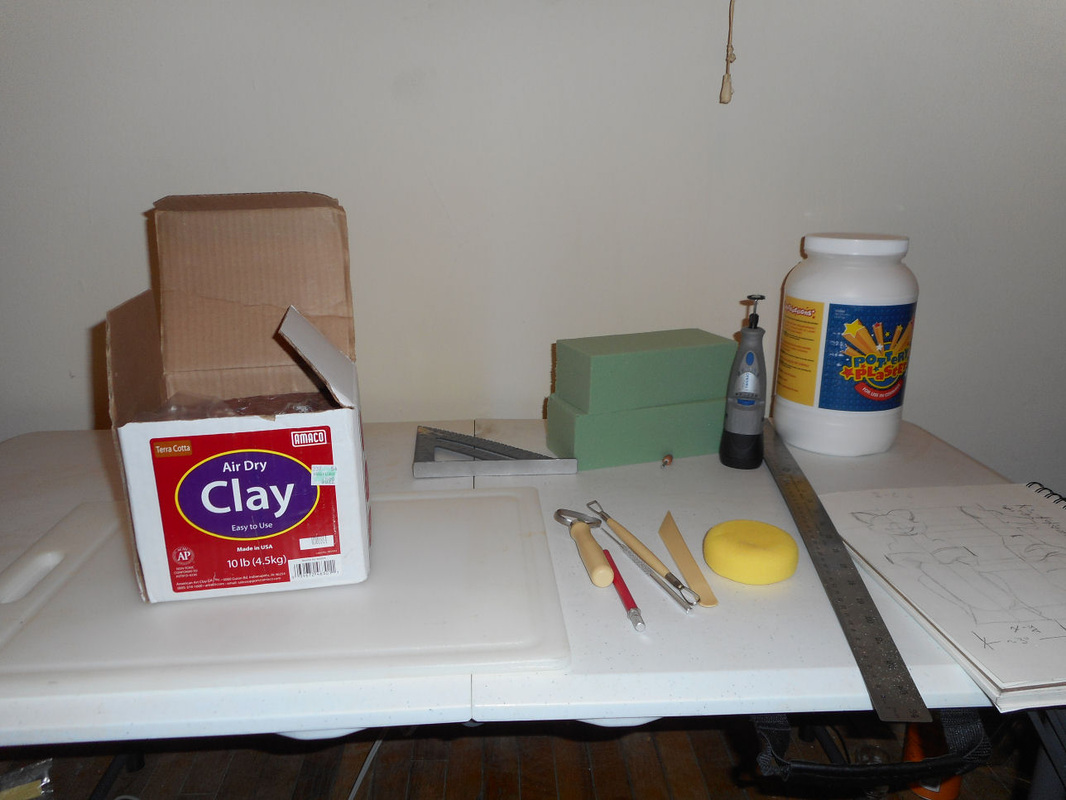
Materials (final list). Big box of clay, clay tools, cordless grinding tool, tub of pottery plaster, 3-pc set of cold chisels, small hammer, files, funnels, my old drafting brush, breathing masks, safety glasses, center of a paper towel roll, duct tape, watercolor paints, disposable bowls for mixing, and drink cups from Lukulo's...the finest eatery in DeKalb ($ cha-chinggg).
The Work.
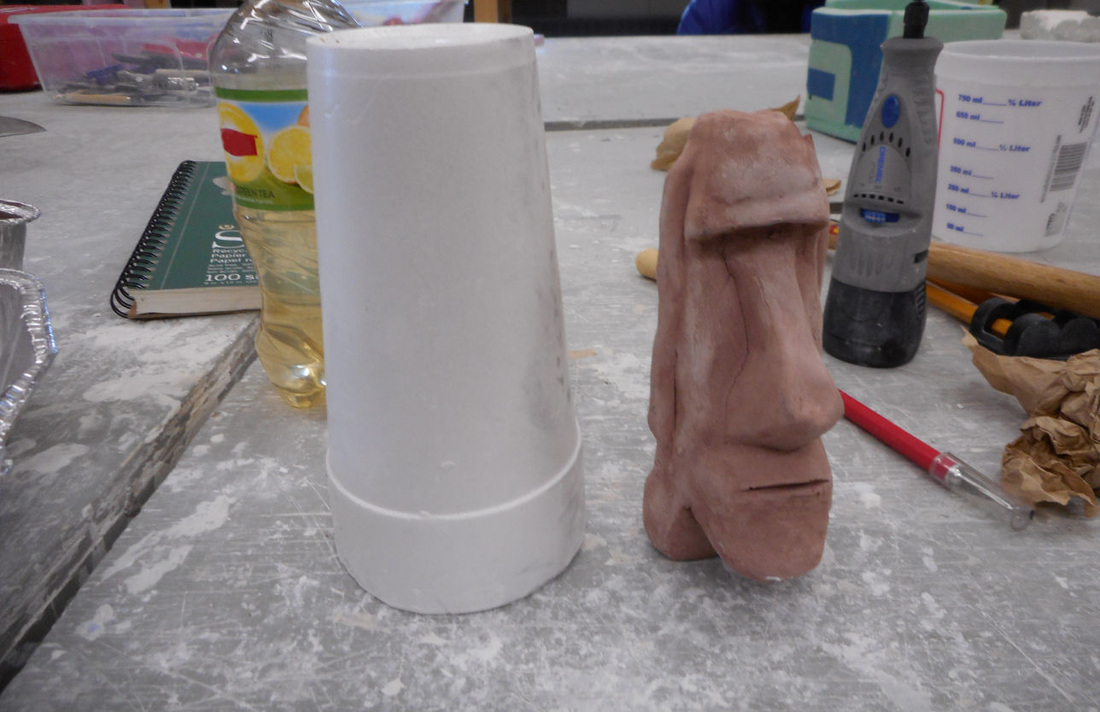
I was amazed how easy it was to create the pre-viz model out of clay. Using my sketches and photo references, it only took about an hour to come up with a great design. "Oh this is going to be simple," I thought to myself. Little did I know that plaster would not be as easy to work with.
Plaster is a gypsum based powder that hardens up pretty quick and releases a bit of heat, which is why people are heavily discouraged against putting various parts of their body into plaster. (At this point, I had the KISS song "Plaster Caster" running through my head. How did Cynthia Albritton do it?? Oh, she said she used dental mold.)
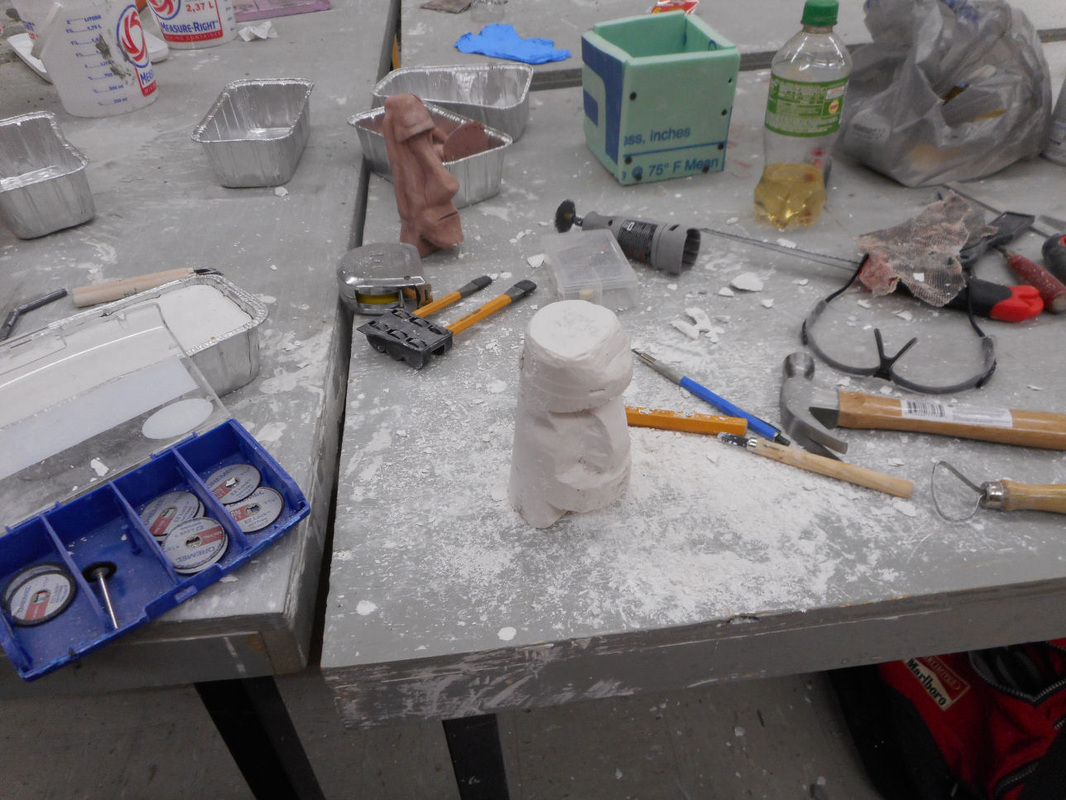
I mixed my first batch and poured it into the drink cup, tapping the sides to remove air bubbles. How I measured the 2:1 plaster:water amount was easy. I filled the cup 1/3 full of water, dumped it into the bowl, and added plaster until it was the consistency of pancake batter. Within half an hour it was hard as a rock! I made my first cut with the grinder and instantly realized that I had better head to the art building. My little hand-held vacuum was never going to handle all this debris and I already looked like Robert Downey Jr on an average night's binge.
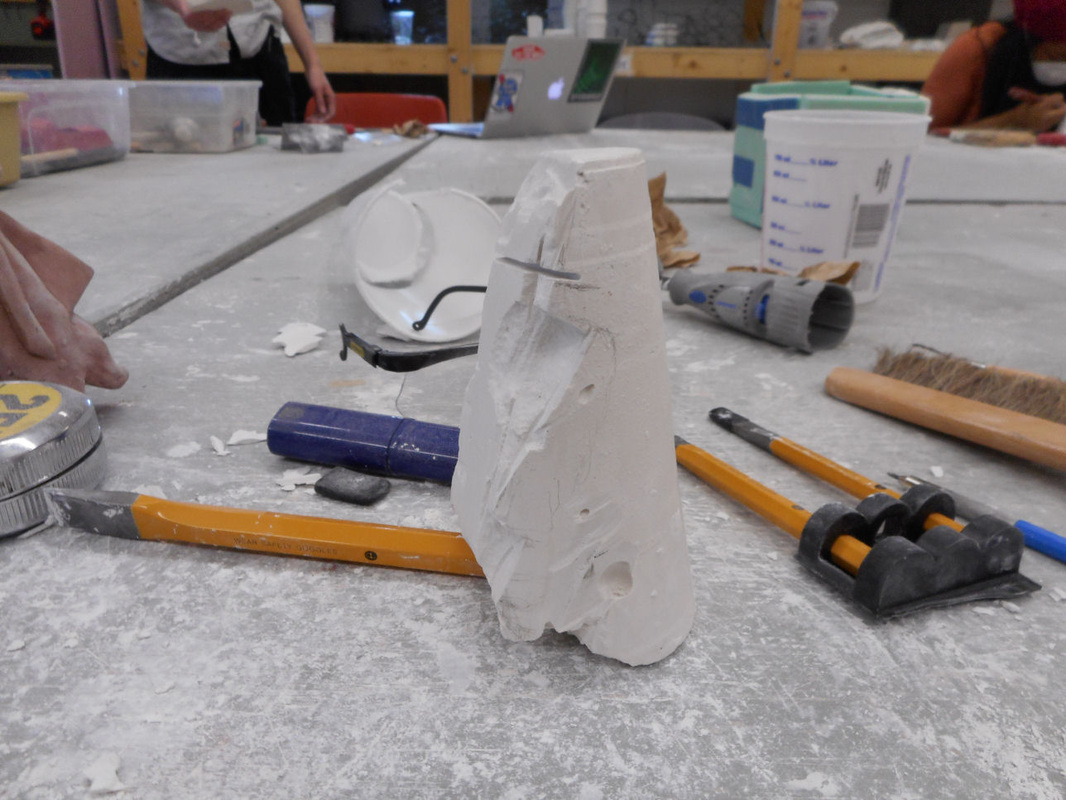
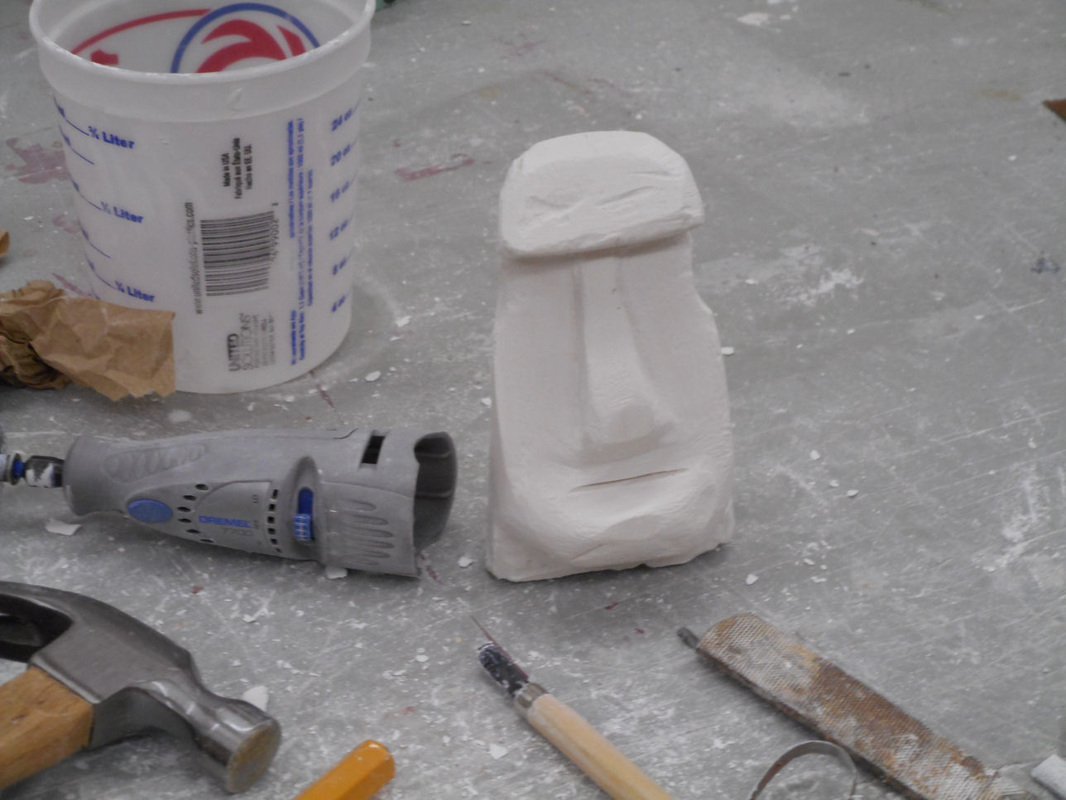
I would use the grinder to create starting points & break points in the plaster, chip away with the hammer & chisels, and smooth it out with the pottery tools & files. The first statue was a learning curve and I was going to pitch it, but held on to it just in case the next one didn't go as planned. Rather than begin from the front as I had on the original, I created a profile on the second one before sculpting the front. This worked much better.
I still had the gargoyle in my head and poured wet plaster into a disposable aluminum loaf pan. The depth of the pan was deceiving and there wasn't nearly enough to create the figure. If anyone needs a plaster brick, please message me.
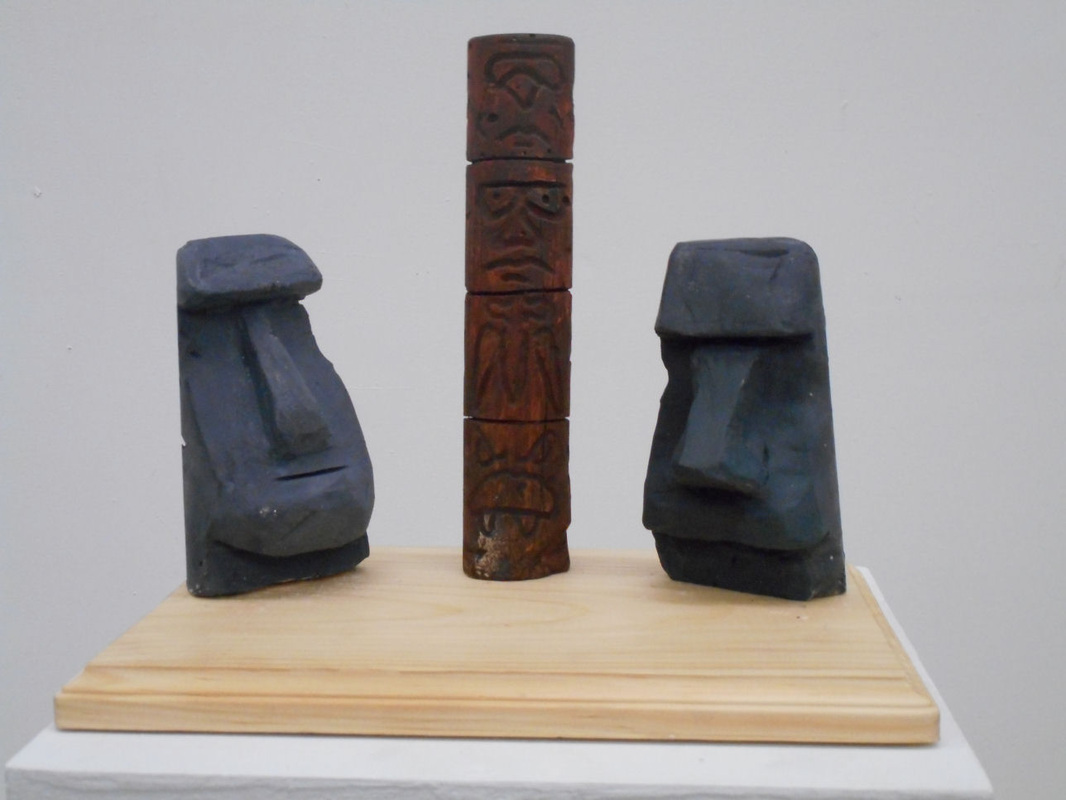
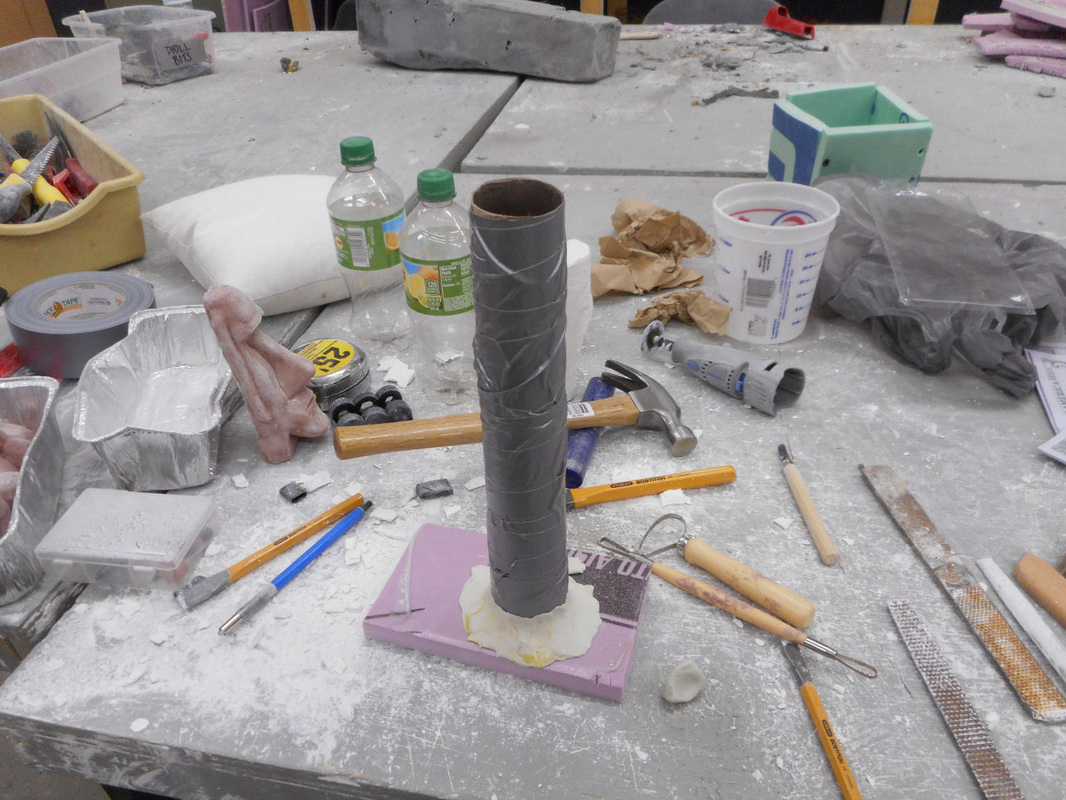
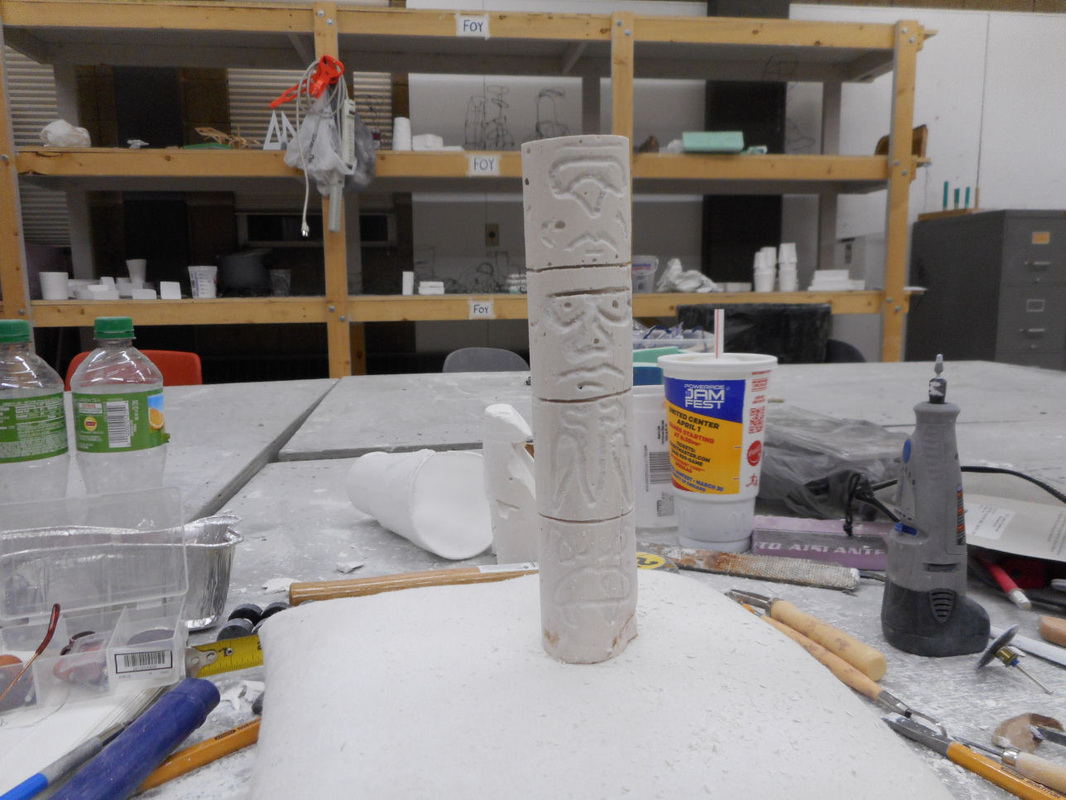
The totem pole was next. I affixed the center of a paper towel roll to an excess piece of insulation foam with available plasticine and poured. I intentionally did not work the air bubbles out to provide a 'pitted' and aged look. Some of the cardboard had stuck to the plaster, but I washed it off. Luckily I was planning on painting it anyway. After I made the first engraving, I realized it looked more like a Polynesian Tiki than Northwest First Nation. Good thing I didn't pitch the original moai, they'd make great bookends for the tiki!
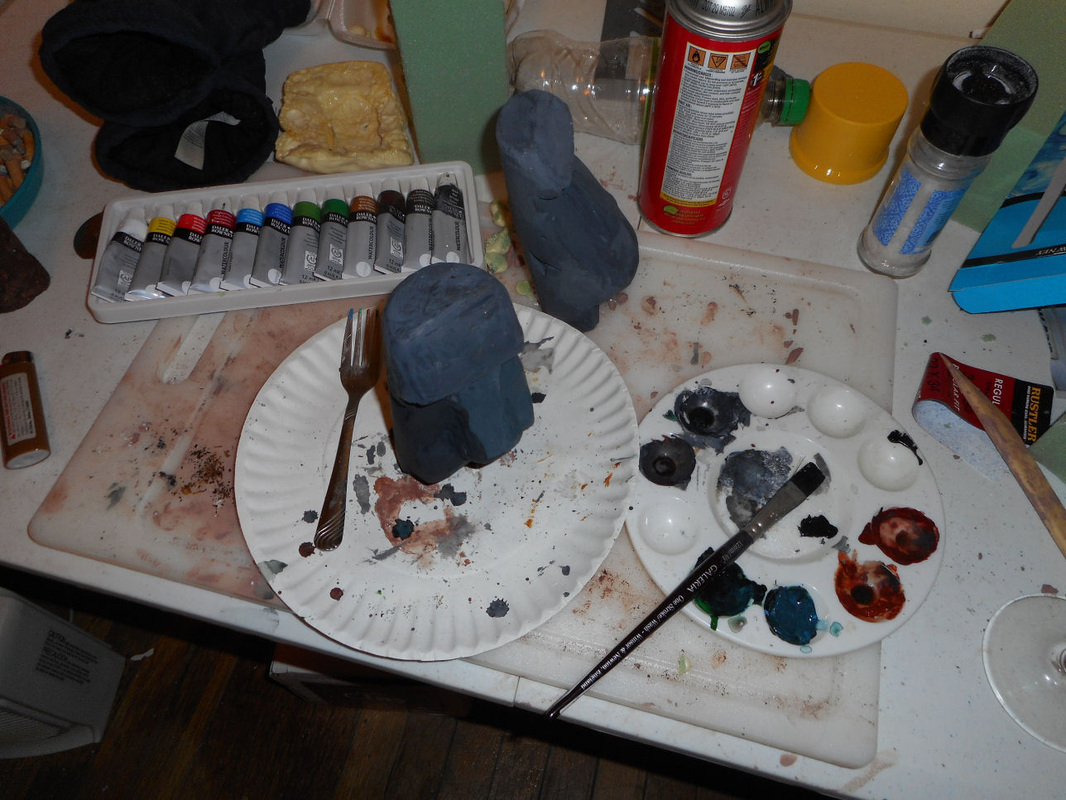
The final step was to paint it. I wanted flat matted colors, so I opted for watercolors. Very simple to mix and apply. To create the aged look, I mixed several variations and added multiple coats.
Ideas. Ideas. Ideas. I can sculpt anything I want. What shall it be. Hmmm. After a number of sketches, I decided on objects that were shrouded in mystery. That's right up my alley as I'll chase almost anything about the unknown down a rabbit hole. Stonehenge seemed too easy as did the Egyptian Pyramids. The carvings at Rosslyn Chapel were a little beyond my ability at this point, so....ah! The Moai of Easter Island, or less specifically, the moai found throughout Polynesia. A totem pole from the Pacific Northwest was still in the back of my head as well as "Olive Goyle," the often ill-fated gargoyle from Altgeld Hall here at NIU.
Beginning.
Starting with some sketches and a refresher about the Rapa Nui was first on the agenda. (Pic 1), then it was off to the hobby store to fill my little workshop with toys and supplies.
I had done quite a bit of research on youTube to learn about various molds, but none of them were specific to the way I planned to do this project.
My original plan was to create a 'positive' out of clay as a visual reference, sculpt into some foam, and pour the plaster into the foam mold. Plan B was to find soft enough foam to "push" the clay figure into. Plan C was to cover the object with sealant foam. I went with Plan D. Sculpt individual pieces out of plaster, so it was off to the hardware store for more toys.
Materials (final list). Big box of clay, clay tools, cordless grinding tool, tub of pottery plaster, 3-pc set of cold chisels, small hammer, files, funnels, my old drafting brush, breathing masks, safety glasses, center of a paper towel roll, duct tape, watercolor paints, disposable bowls for mixing, and drink cups from Lukulo's...the finest eatery in DeKalb ($ cha-chinggg).
The Work.
I was amazed how easy it was to create the pre-viz model out of clay. Using my sketches and photo references, it only took about an hour to come up with a great design. "Oh this is going to be simple," I thought to myself. Little did I know that plaster would not be as easy to work with.
Plaster is a gypsum based powder that hardens up pretty quick and releases a bit of heat, which is why people are heavily discouraged against putting various parts of their body into plaster. (At this point, I had the KISS song "Plaster Caster" running through my head. How did Cynthia Albritton do it?? Oh, she said she used dental mold.)
I mixed my first batch and poured it into the drink cup, tapping the sides to remove air bubbles. How I measured the 2:1 plaster:water amount was easy. I filled the cup 1/3 full of water, dumped it into the bowl, and added plaster until it was the consistency of pancake batter. Within half an hour it was hard as a rock! I made my first cut with the grinder and instantly realized that I had better head to the art building. My little hand-held vacuum was never going to handle all this debris and I already looked like Robert Downey Jr on an average night's binge.
I would use the grinder to create starting points & break points in the plaster, chip away with the hammer & chisels, and smooth it out with the pottery tools & files. The first statue was a learning curve and I was going to pitch it, but held on to it just in case the next one didn't go as planned. Rather than begin from the front as I had on the original, I created a profile on the second one before sculpting the front. This worked much better.
I still had the gargoyle in my head and poured wet plaster into a disposable aluminum loaf pan. The depth of the pan was deceiving and there wasn't nearly enough to create the figure. If anyone needs a plaster brick, please message me.
The totem pole was next. I affixed the center of a paper towel roll to an excess piece of insulation foam with available plasticine and poured. I intentionally did not work the air bubbles out to provide a 'pitted' and aged look. Some of the cardboard had stuck to the plaster, but I washed it off. Luckily I was planning on painting it anyway. After I made the first engraving, I realized it looked more like a Polynesian Tiki than Northwest First Nation. Good thing I didn't pitch the original moai, they'd make great bookends for the tiki!
The final step was to paint it. I wanted flat matted colors, so I opted for watercolors. Very simple to mix and apply. To create the aged look, I mixed several variations and added multiple coats.
Reflection.
In typical KC fashion, I made things more difficult for myself than necessary. I spent more time experimenting with foam than actually working on the figures. Each moai took about eight+ hours to sculpt I worked rather quickly at first, but as I subtracted the plaster; I slowed to a snail's pace. One wrong hit with the hammer & chisel and it would've cracked in half. I certainly didn't want to glue it back together, nor did I wish to start over.
The first moai could've been better, but it was part of the learning curve. I was much more impressed with my clay work and quite enjoyed it. Once I learn more about the proper ways to make molds of the clay 'positives', I will definitely look into creating some unique figures for possible sale. I spent more than I cared to on my 'toys', but they will be available anytime I need them.
KC
(19-FEB-2015)
